
The language you see in the pictures is Japanese. Even if you use another language, basically everything is the same.
STEP2
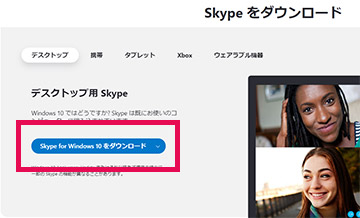
Choose your preferred device from the page and start downloading.
*If you are a Windows user, click "Get Skype for Windows".
*If you are a Mac user, click "Skype for Mac".
STEP3
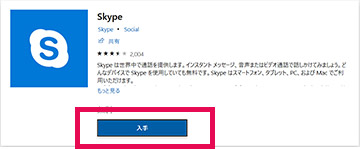
Start installing Skype.
Follow directions on the page and continue installing.
*If you are a Windows user, you will be instructed to install from the Microsoft Store.


STEP4
After launching Skype, you will see a view just like the picutre here. Click on "Create one!".

STEP5
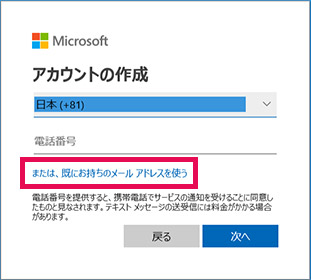
Next view, your will see "Use your Email instead". Click it and enter your Email address.

STEP6
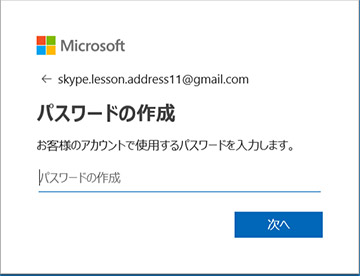
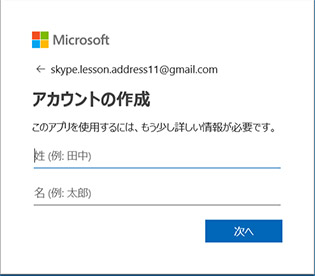
Enter password and your name.
STEP7
You will receive an Email with a code. Enter the code on the Skype page.

STEP8
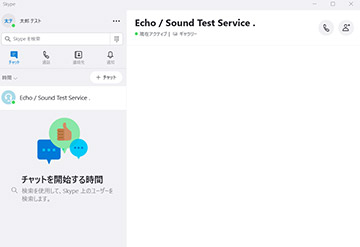
Click "Echo/Sound Test Service" then the phone icon. Then audio testing will start.
*If you are using a headset, put on your headset.
STEP9
If you hear your voice through the audio test, your Skype settings are ok.

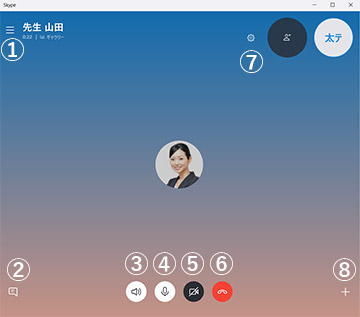
1. Display your contact list: You can display or hide your contact list.
2. Display IM:You can display text messages.
3. Speaker:You can adjust the speaker volume.
4. Microphone:You can put your microphone on mute.
5. Video:You can turn on/off the video.
6. Hang up:You can hang up the call.
7. Sound and video settings:You can change the settings for sound and video.
8. Others:You can share your screen or use snapshots.
Trap1:
Click "Accept" which is your teacher's contact request on your Skype screen before lesson starts.
If you don't click "Accept", you might not be able to receive a call or use the message function. Make sure you click "Accept" before the lesson starts.
Trap2:
After launching Skype, click on the name on the upper left and you will see your Skype Name. If there is "live:", it is a part of your Skype Name. Make sure you add it when you register your Skype Name on Janguage.
Back to Top